Want to make a rack diagram that you can print and share? Here shares some guidelines for creating professional rack diagrams. Creating rack diagrams with pre-made symbols and templates is rather easy.
What's a Rack Diagram?

A Rack Diagram helps build a graphic framework of components housed in a computer rack, in order to organize the components virtually and document the computer equipment configuration. The components may include servers, switch equipment, Router, Raid, UPS, hard disk drives, modems and other electronic equipment. Learn ultimate rack diagram tutorial to get more details.
Create a Rack Diagram
Start with the Exact Rack Diagram Template
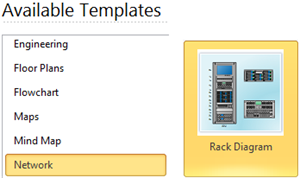
The Rack Diagram Template helps you easily create rack diagrams using extensive built-in network symbols. I will illustrate the steps based on the software i usually use. Open the software, find Rack Diagram template from Network Category on the starting page and double click to enter the drawing page. You will discover abundant symbols and easy-to-use tools available for rack diagrams.
Use Standard Built-in Rack Symbols
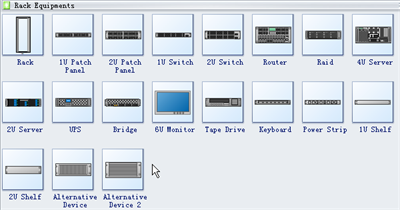
This software offers a great number of high-quality network symbols for rack diagrams, including serial devices, router, ups, bridge, monitor, rack, raid, tape drive, switches, and lots of new devices for use in diagramming rack framework. All the symbols are in vector format and are smart in setting u numbers. Simply drag and drop the one you need from the library pane and set the u number. If you want to learn more about the symbol meaning and usage, please visit Rack Diagram Symbols page for more information.
Basic Steps:
1. On the File menu, point to New, point to Network, and double click the Rack Diagram template. A new drawing page will open.
2. Go to the library pane on the left of the canvas. From Rack Equipment group, drag a rack shape onto the canvas.
3. Choose a required equipment shape and drop onto the rack shape.
- Note: Equipment shapes can be glued to the rack to better fit the size. When you position an equipment shape onto the rack, connection points ( blue x ) will appear on the rack shape. When the two ends of equipment shape turn red, it means they are already glued.
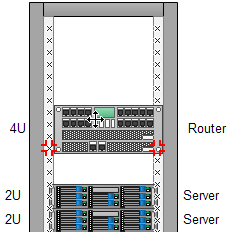
4. Double click the left part of the equipment shape to edit u number, while double click the right part of the equipment shape to edit description.
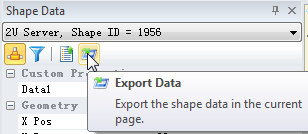
5. To store data with a shape, right click the shape and choose Define Shape Data from the context menu. In the pop-up dialogue box, input values for the data you want to store.

6. To export data report, click Shape Data button under View tab, a shape data floating window will show on the right of the canvas. Click the Export button on the top of the floating window and you will see a dialogue box for data report.
Print: When a rack diagram is done, it's easy to print and share with more people. On the file menu, point to Print to set for print options. You can change settings with fewer clicks and see the print preview in real time. Go to Print Diagrams for detailed information about printing.
Export: This software offers support for exporting your diagram to various formats, including Microsoft Office, PDF, and many other graphic formats. On the File menu, point to Export & Send for Export options. Find more instructions on Export Files to other Formats.
没有评论:
发表评论