We know that workflow diagrams are commonly used in businesses and organizations. And now we will provide a simple guide on how to create workflow diagram with a professional diagram application.
Workflow Diagram Overview
A Workflow Diagram is a visual step-by-step guideline for completing a task or process. A successfully-built workflow chart not only depicts the flow of tasks and the steps to complete a job, but also identifies the critical steps and locates problem areas. It works as an invaluable analytical tool to help increase efficiency and avoid bottlenecks.
It enables every member involved in the work to understand the work sequence and what department will be handling what duties. It allows them to better understand not only their job responsibilities, but also other members’ roles, which increases accountability.
How to Create a Workflow Diagram
Start with the Exact Template
Start the software, the Workflow Diagram Template helps you easily create workflow diagrams using extensive built-in symbols. Find Workflow template from Business Diagram Category on the starting page and double click to enter the drawing page. You will discover abundant symbols and easy-to-use tools available for workflow diagrams.
Use Standard Built-in Symbols
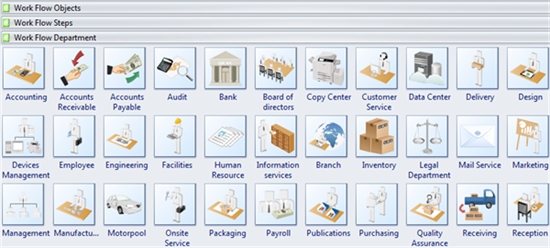
Apart from basic flowchart shapes, this software also offers a large amount of high-quality built-in workflow symbols, which are categorized in three groups in the library as workflow objects, workflow steps and workflow departments. Besides, numerous illustrations are also available in use. All the symbols are in vector format and allowed for modification. Simply drag and drop any symbol you would like to use from the library pane. If you want to learn more on this part, please visit Workflow Diagram Shapes page for more information.
Basic Steps:
1. Start a blank workflow diagram drawing page:
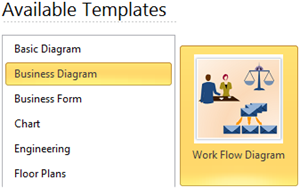
On the File menu, point to New, point to Business Diagram under Available Templates, and double click the Workflow Diagram template. A new drawing page will open.
2. Add shapes:
Go to the library pane on the left of the canvas. Drag the shapes you need onto the canvas.
3. Edit text:
Double click a shape to edit text.
4. Resize a shape:
Click on the shape once to select the shape, and drag the green control handles to resize the shape.
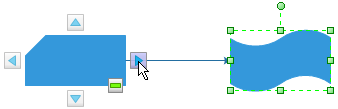
5. Use floating arrows to connect an adjacent shape:
Hover your mouse over each shape and click one of the arrows that appears along its border to link it to an adjacent shape with a connector.
On the File menu, point to New, point to Business Diagram under Available Templates, and double click the Workflow Diagram template. A new drawing page will open.
2. Add shapes:
Go to the library pane on the left of the canvas. Drag the shapes you need onto the canvas.
3. Edit text:
Double click a shape to edit text.
4. Resize a shape:
Click on the shape once to select the shape, and drag the green control handles to resize the shape.
5. Use floating arrows to connect an adjacent shape:
Hover your mouse over each shape and click one of the arrows that appears along its border to link it to an adjacent shape with a connector.
6. Change connector style:
Right click on a connector and choose Convert to Right-Angle (Curved/Straight) Connector to directly change the connector style. To change the line color, weight, arrow style and etc., please go to Home tab, Line button for more options. Read Line and Line Ends to learn more about line setting. Please refer to Fine Tune Workflow Diagrams for detailed guide about final touches.
Right click on a connector and choose Convert to Right-Angle (Curved/Straight) Connector to directly change the connector style. To change the line color, weight, arrow style and etc., please go to Home tab, Line button for more options. Read Line and Line Ends to learn more about line setting. Please refer to Fine Tune Workflow Diagrams for detailed guide about final touches.

7. Print: When a workflow diagram is done, it’s easy to print and share with more people. On the file menu, point to Print to set for print options. You can change settings with fewer clicks and see the print preview in real time. Go to Print Diagrams for detailed information about printing.
8. Export: This software offers support for exporting your diagram to various formats, including Microsoft Office, PDF, and many other graphic formats. On the File menu, point to Export & Send for Export options. Find more instructions on Export diagrams to other Formats.
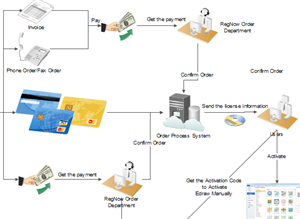
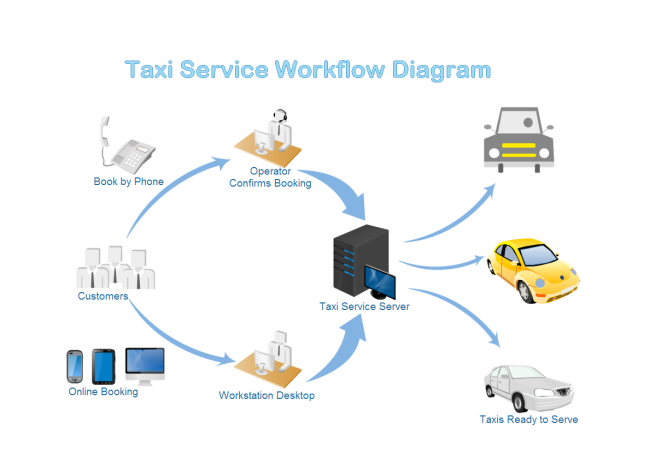
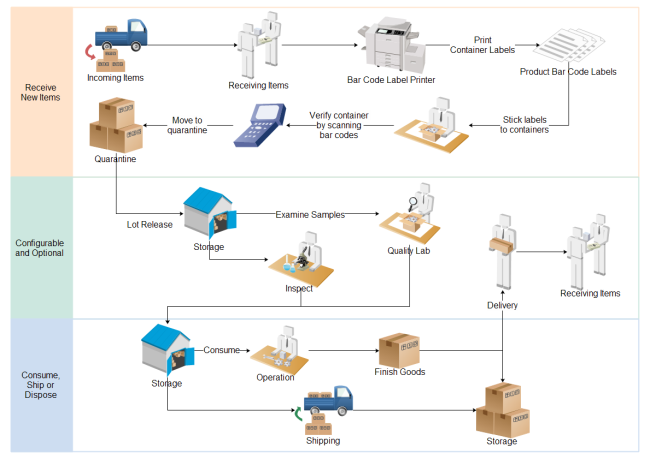
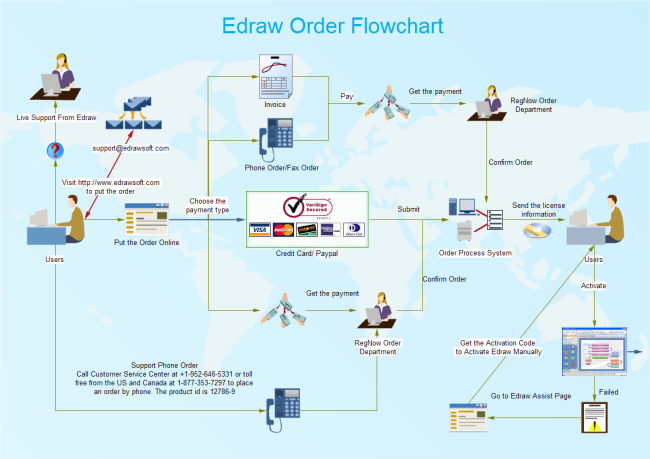
Workflow Examples
没有评论:
发表评论