This tutorial shows you how to create BPMN diagram on Mac step by step. We offer a time and energy-saving solution through which you can gain professional and nice BPMN diagrams even without any experience.
Create a Blank BPMN Drawing Page
Open a blank canvas and the libraries including shapes needed for creating BPMN Diagrams.
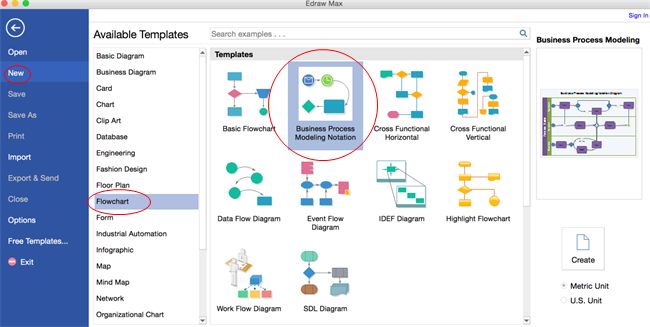
On the File menu, point to New.-> Click Flowchart, and then double click the icon of Business Process Modeling Notification.
Add BPMN Diagram Shapes
Drag and drop shapes from BPMN Shapes library to the canvas. Drag the green square handles to resize shapes.
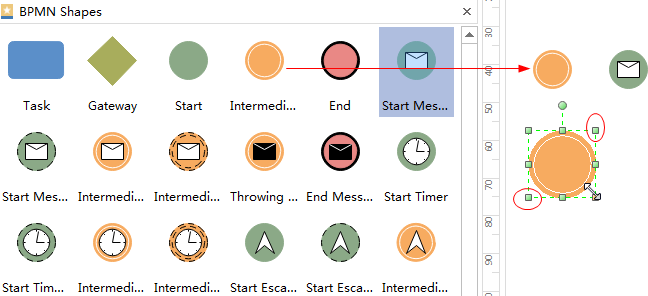
You can use Same Size tool under Home tab to let several shapes have the same size quickly.

Format BPMN Diagram Shapes
Change a shape's color and outline by choosing any quick style in the Styles group under the Home tab.
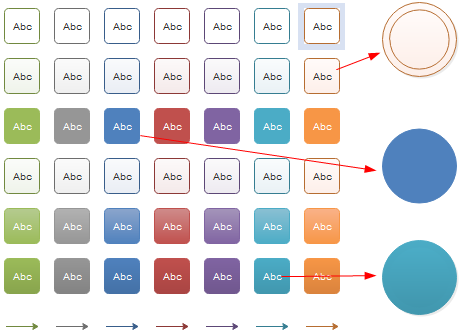
Right-click shapes to set the attributes of each object. Every BPMN shape has some underlying data, or attributes. These attributes specify the appearance of the shape, as well as additional data associated with the shape. Right-click the shape and click Define Shape Data to view and change the main attributes in the shortcut menu.
Connect BPMN Diagram Shapes
There are 3 ways to connect BPMN shapes.
- The built-in BPMN Diagram shapes are designed with 4 connection points and 4 floating action buttons that allow auto connection. Click the floating action button pointing to a nearby shape will generate a connector which links these two shapes.
- You can also use the Connector tool under Home tab to connect shapes manually.
- One more way is to drag a shape over the floating point of its previous shape. When a red box shows around the floating button, release the mouse.
The BPMN specification calls for three types of connectors: Sequence Flow, Message Flow, and Association. Connectors you add by using AutoConnect or the Connector tool are Sequence Flow connectors by default. You can change the type by right-clicking the connector and then clicking the type you want in the shortcut menu.

Add Background
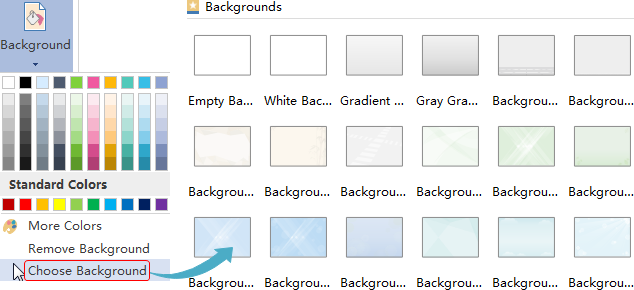
To add a background, go to Page Layout tab and then:
- Click a color for colorful background.
- Click Choose Background to select a predefined background.
- Click Remove Background if you don't like the added background.
- Switch to View tab and then click Background View to edit and personalize the background.
Add BPMN Diagram Contents
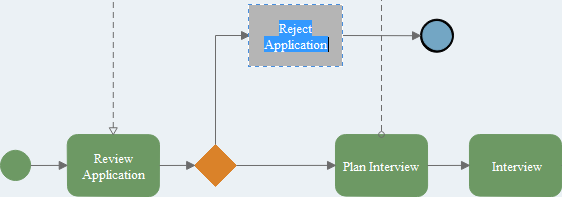
- Double click a shape to type in text.
- Press Ctrl + 2 to add more text boxes. Press Ctrl + shift + 2 to adjust text box.
- Choose a different font under Home tab. Customize the size, color and alignment by clicking the relevant menus.
- Drag the yellow control point to move text box quickly.
Change BPMN Diagram Theme
By changing BPMN Diagram theme, you can enhance fill, line and text style altogether at 1 click.
Switch to Page Layout tab, select another theme.

Save or Export BPMN Diagram
Click Save on File tab to save as the default format. Choose Save as on File tab to save as other formats.
You can choose to save in local files or save in your Cloud. Saving it in Team Cloud can share it with more people.

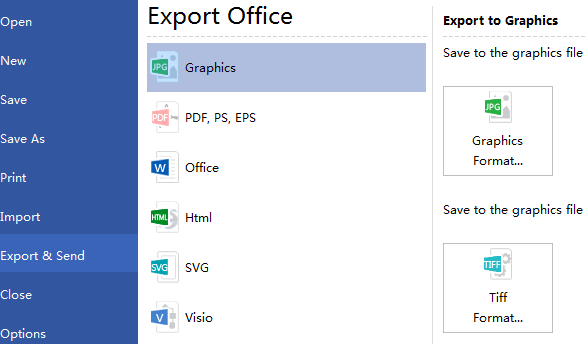
Hit Export & Send under File to export the BPMN Diagram as graphics, MS files and web documents and so forth.
Print BPMN Diagram
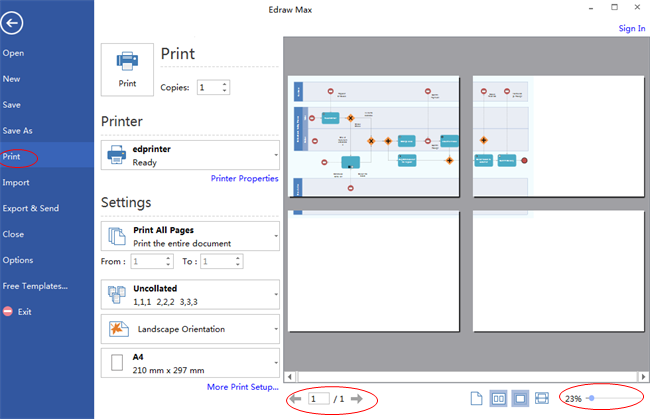
- Click File tab and then choose Print. A preview of your document automatically shows.
- To view each page, click the arrows below the preview.
- TIP: Use the zoom slider below the preview to magnify the image of the document.
- To go back to your document and modify it before printing it, click the top left arrow.
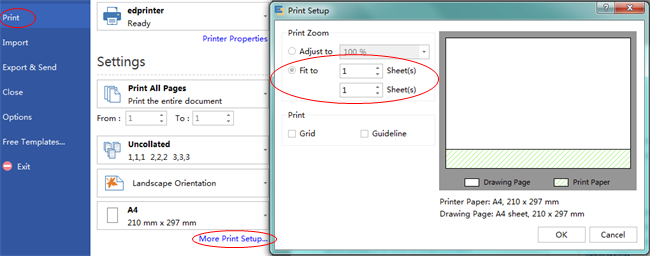
If the drawing page is larger than the print paper, the drawing will be printed on more than 1 paper. To print it on only 1 paper,
click More Print Setup... and then choose Fit to.
click More Print Setup... and then choose Fit to.
Here are some BPMN diagram examples. They can help you get inspired and get started quickly to create BPMN diagrams.

没有评论:
发表评论